This article is the first in a series of guides on how to make the most of Claimable.
Filters are one of our most versatile features and definitely one of the most used. But often they are not leveraged to their full potential.
The filtering functionality enables you to report on claims, tasks, contacts and companies managed in your Claimable account. They are super easy to use and allow you to effectively group your data enabling better management of your workload.
Good organisation of information is key to maximising productivity and effectively managing your time. And, whilst organisational skills get you a long way, having the right tools undoubtedly improves results further.
This is where filters come in because creating the right ones will give your team an immediate productivty boost by providing an at-a-glance overview of what is most important, a guide to their workflow and and easy wasy to report on key metrics.
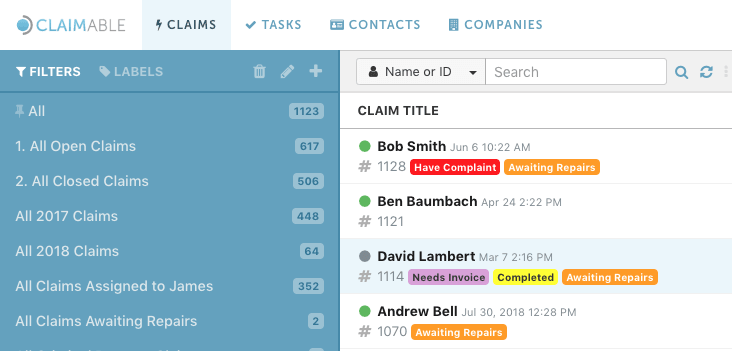
With the following tips on filtering claims, you will be able to configure your Claimable account to give prominence to key metrics and manage your workload effectively.
Closed and Open Claims
Being able to see which claims and how many are closed and open is critical to efficiently managing your time and driving your attention to the relevant ones.
Make sure you promptly update the status of the claims as you work on them so that the filters are a true reflection of what is going on.
Also, as filters show you the number of claims in them, it is satisfying and encouraging for your team to see the number of closed claims increase, as they become settled!
Pro Tip: Filters are ordered alphabetically. To keep the relevant filters at the top of your list you may want to number them so that they appear in your preferred order.

Creation Date
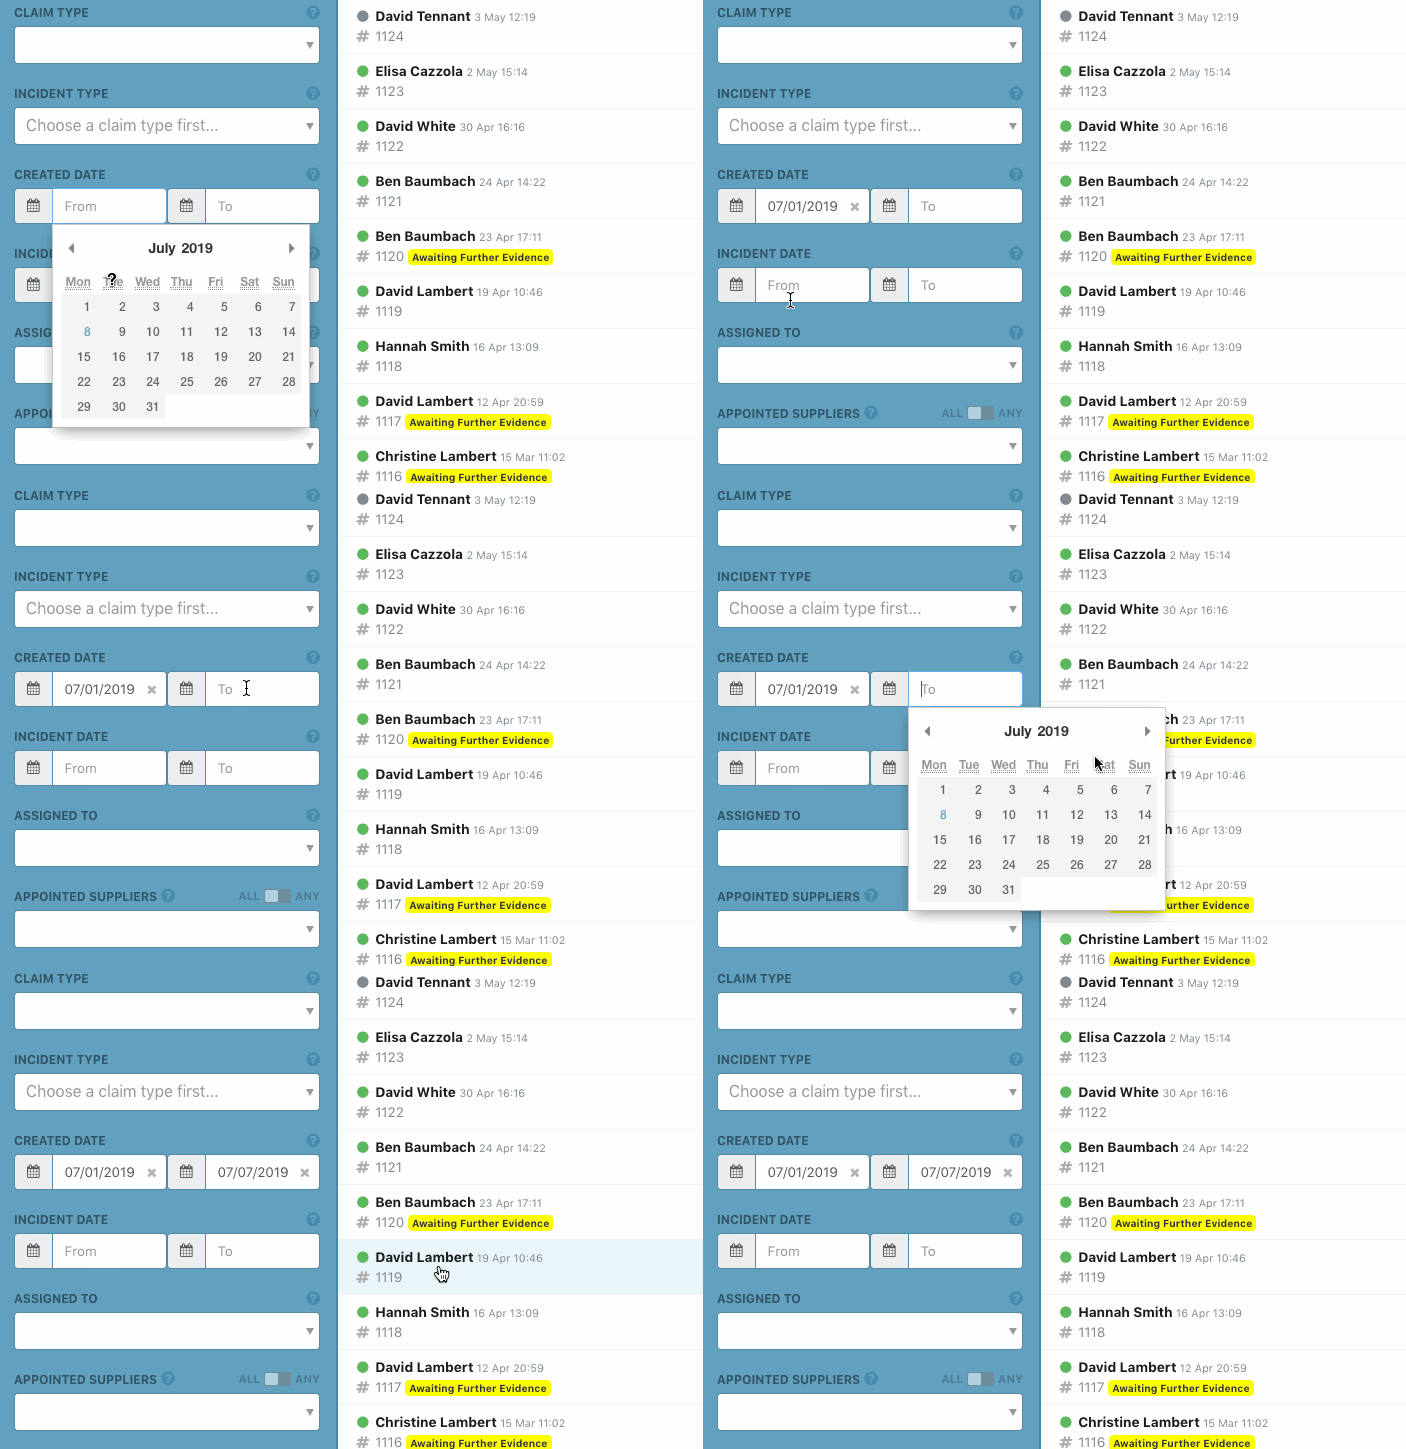
You can filter your claims by the date they have been created. This way, you can group and prioritise them depending on the amount of time they have been open for, which can help draw attention to dormant claims needing attention.
Claim Type and Incident Type
Whether you are dealing with multiple claim types or just one, being able to group claims easily based on their claim type or incident type (or both) helps you action them accordingly, and ensure the correct workflow is carried out for each.
For example, all motor claims with the incident type of "Collision with third party", will likely require the third party in question to be contacted and details collected. Grouping these into a filter can help you batch process claims to advance their progress efficiently.
Assigned To
Being able to spot at a glance which claims are appointed to you and which ones to your colleagues will help you manage your team's tasks in a time-effective way.
Pro Tip: Combine filtering by "Status" and "Assigned to" to better group workload and manage accountability.
Advanced Filter Usage ✨
When creating a filter, remember that you can combine two or more different attributes to be more specific. For example, you may want to combine Incident Type and Incident Date to improve the accuracy of your segmentation.
In Combination With Labels
Labels in Claimable are used to categorise claims by highlighting specific characteristics you want to call attention to. By combining the filter options with labels you can create powerful reports.
For example, let's say you have an "Awaiting Repairs" label and you also appoint your claims to repairers via the Appointing Suppliers feature.
By combining the "Appointed" field and the label "Awaiting Repairs" in your filter, you will be able to see those claims awaiting repairs for a specific repairer.
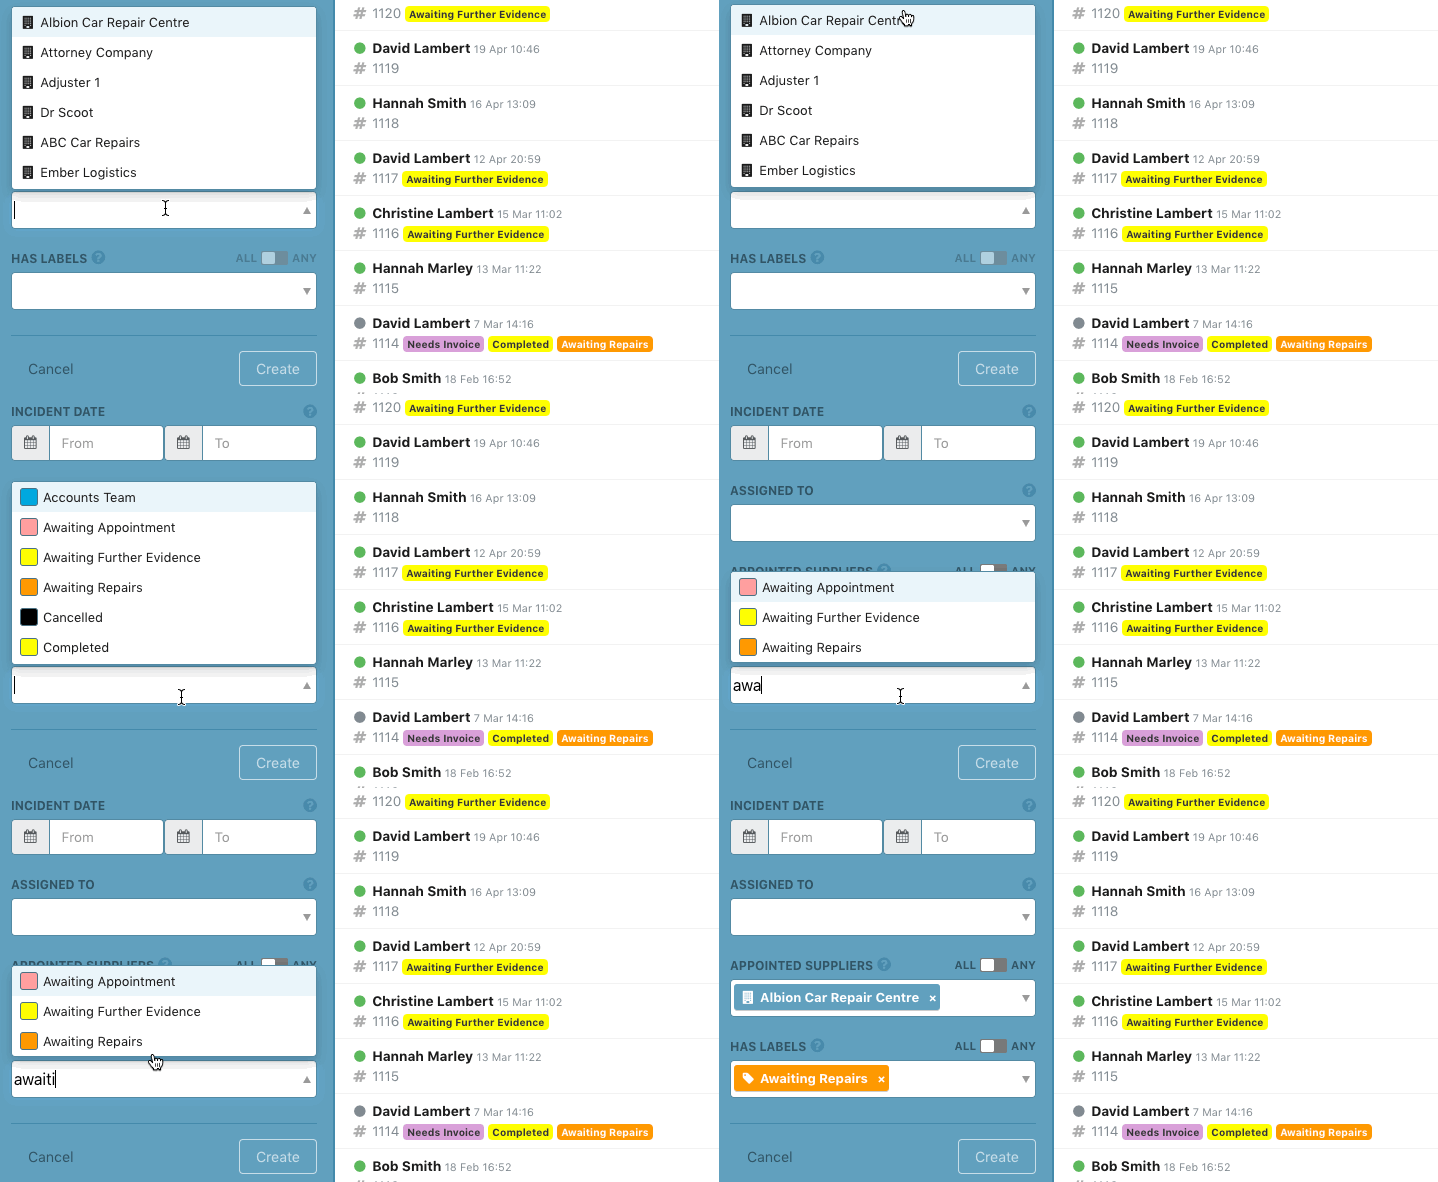
Now, let's imagine that your team report that some customers have called to complain about their repairs taking too long, at least 2 weeks instead of the expected 1 week. Having created the above-mentioned filter you can already see which repairer has the largest number of claims with the label "Awaiting Repairs". But, it would also be very useful to be able to see how many of these have been created more than two weeks ago? Well, you can do that just by combining more filter options! This gif explains exactly how:
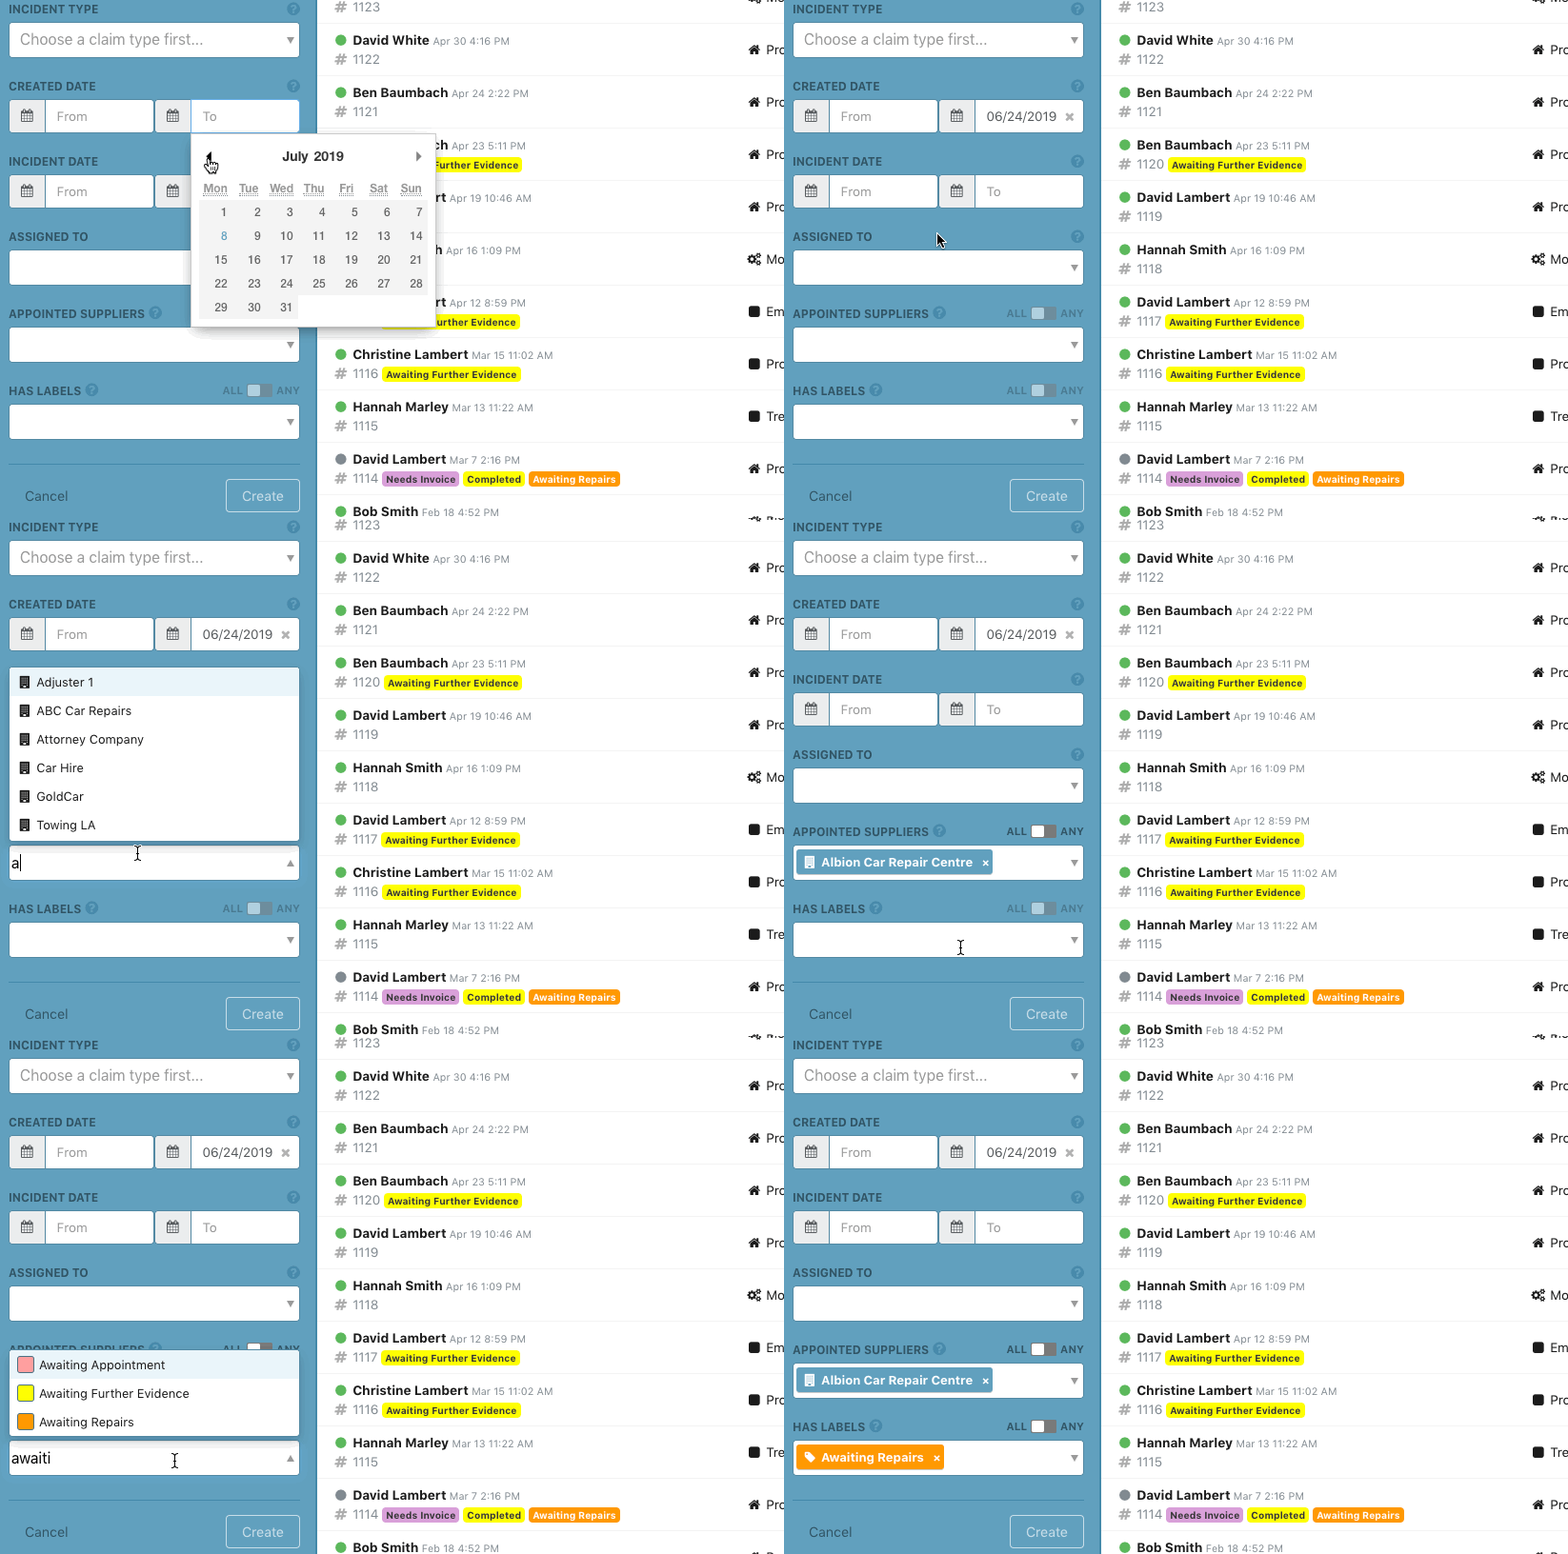
Pro Tip: To select the claims that have been created more than 2 weeks ago just fill in the "Created Date To" field with the date before the claims' creation date needs to be.
Now, let's move a step forward. Imagine that your team has been adding the label "Have Complaint" to those claims customers have been moaning about.
This makes it even easier for you to create a report. In fact, you will be able to filter all those claims that have both the label "Awaiting Repair" and "Have Complaint". To do so, you just need to add them in the filter and tick "All" as shown below.
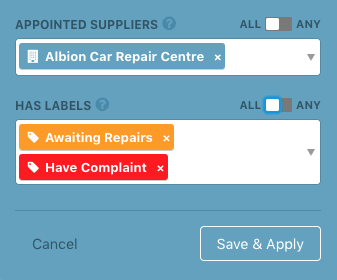
Building a filter like this will enable you to see all claims created at least 2 weeks ago, appointed to a specific supplier and that are both "awaiting repairs" and where the customer has filed a complaint.

These are just an example of what you can do with filters in Claimable. They are a powerful workflow and reporting tool. There are many possibibilites and we encourage you to get creative and experiment with filters for your account.
Remember: Claimable allows you to create as many filters as you want and you can also delete them at any time. Deleting a filter doesn't affect the claims in it. So, don't be afraid of adding, deleting and editing them as much as you want. And make sure you encourage everyone in your team to do the same!
Still have some questions?
We are always happy to have a call with you and your team to help you get the most out of Claimable so just get in contact and we will schedule that. 🙌
